Gear, Tours and Tips: Making the Most of Your Mt. Fuji Climbing Experience

A sign pointing toward the trail to Mount Fuji's summit.

Reaching the summit of Japan’s iconic Mount Fuji is often on the short list of activities for visitors, but few realize the small window of opportunity for novice climbers. At more than 12,000 feet of elevation, the terrain is only passable for about 8-10 weeks from mid-July to early-September.

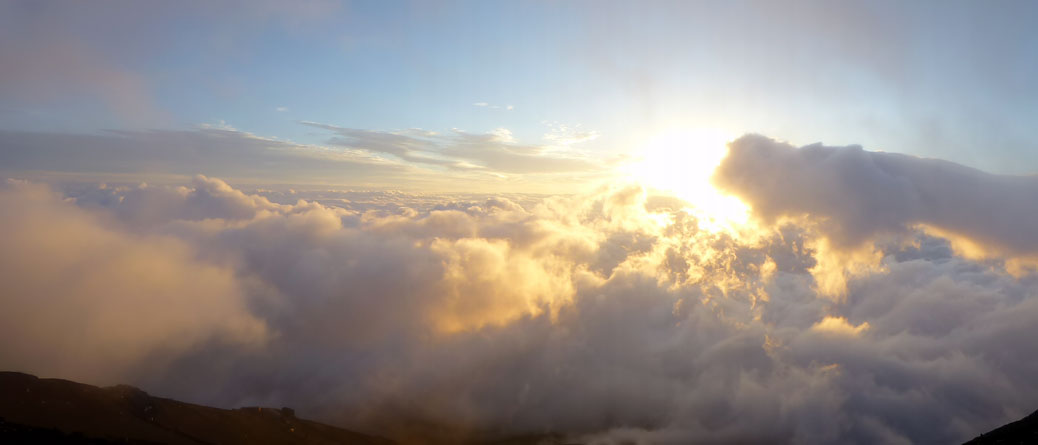
The view of the sunrise from the summit of Mount Fuji makes climbing through the night all worth it.

Reaching the Top

The top of Japan’s tallest peak can be reached a few different ways, but most climbers attempt to arrive at the summit for the sunrise. Arriving by 4:30 a.m. requires climbing during the middle of the night. While it’s possible to make all of the arrangements yourself, it’s much simpler to book a tour through one of the many companies leading both local and foreign visitors to the top.

We made our summit in August 2014 and chose Willer Express as our travel company. With daily tours departing from near Tokyo’s Shinjuku Station, Willer Express provides bus transportation to and from Fuji’s 5th Station, an English-speaking guide, mountain hut lodging at the 8th Station, three meals and a visit to an onsen (hot springs).

Gear Up

With the 90ºF temperatures of the Tokyo summer, it’s hard to imagine you could be fighting off hypothermia less than 24 hours later. Having the right gear may be the most important consideration in making the climb an enjoyable experience.

Most tour companies offer an affordable gear package, which can be convenient for novice climbers or those traveling light. If you bring your own gear, consider the following items at a minimum:

Lightweight daypack with rain cover. Bring a bag just large enough to carry your gear. From Tokyo to Fuji’s summit, you’ll experience a 40-60ºF decrease in temperature, so you’ll need to be able to swap gear on and off along the way.

Waterproof jacket and pants. When it rains, it pours. Literally. On our summit, it started raining about 20 minutes before we reached the mountain hut at Station 8. By the time we arrived, we were soaked to the bone, even with our rain gear. Hut employees won’t allow you inside until you are dry and will greet you with leaf blowers and towels to keep the rainwater outside.

Waterproof hiking boots/shoes. With the steep ascent and descent, you’ll want properly-fitting hiking shoes with good traction. I’d recommend buying these beforehand and testing them in the wild rather than renting an ill-fitting pair of shoes on the morning of the climb. A pair of gaiters isn’t a terrible idea either to keep rain from entering via the tops of your shoes.

Cold-weather clothing. Poor clothing choices are one of the most common mistakes made by Fuji first-timers. Average temperatures at the summit are around 40ºF, but can feel much closer to freezing due to wind chill and the aforementioned rain. Dress in layers so you can add and remove as needed during the climb.

The terrain on the ascent of Mount Fuji varies from flat, volcanic rock to steep, rocky peaks. The right gear will make your experience all the more enjoyable.

Hiking poles. Poles aren’t necessary for the ascent, but will come in handy on the long, steep descent. You can purchase a souvenir wooden pole and can have it stamped at each of Fuji’s stations to mark your progress. Make sure you have gloves if you choose the wooden pole as it’s more for looks than utility.

Hats. You’ll be climbing both in the sun during the day and in the cold at night. Consider a brimmed hat for keeping the sun away and a hat that will cover your ears for early-morning climbing.

Gloves. Bring warm, durable, waterproof gloves with good grip. I had warm gloves, but once they were wet, they were no longer warm. You’ll also be using your hands a lot near the final ascent to the summit, so they’ll need to stand up to sharp rocks.

Mt Fuji Headlamps
The view from our hut window around 1 a.m… a never-ending string of headlamps joining us for the climb to the summit

Headlamp. You’ll need your hands free to navigate the rocks near the summit, making a headlamp a better choice than a handheld flashlight. One of my favorite sights was waking up at the mountain hut at 1:30 a.m. and seeing the endless headlamps coming up the trail behind us.

Sunglasses/sunscreen. Fuji is exposed to all the elements, especially the sun. Bring a good quality sunscreen and UV-blocking sunglasses.

Water and snacks. Our tour company recommended three liters of water per person for the entirity of the climb. You can carry it all with you or bring one and purchase additional bottles at stations along the way. While it’s more economical to bring your own, it might be worth the extra yen to lighten your load.

Change of clothes. Bring a change of clothing and shoes, especially if you choose a package that ends with an onsen visit. The ride back to Tokyo will be much more pleasant in a clean outfit.

Japanese yen. Mount Fuji is one of the few places in Japan where you’ll find pay toilets. At 200-300 yen ($2-3 USD) per turn, you’ll want to budget accordingly. You can also buy additional water, snacks and gear at each of the stations. Japan is a very cash-oriented society, so carrying large amounts of money is not unusual.

Camera and extra batteries. The views on the mountain are breathtaking and you’ll have plenty of opportunities to take photos. I don’t recall electrical outlets in the mountain hut, so make sure you have extra batteries or a portable charger.

Extras. If you are prone to elevation sickness, oxygen canisters can be purchased along the way, but you might consider bringing one with you in case canisters are sold out. In our group, the first case of elevation sickness from the thin air showed up around the 7th Station.

The sleeping arrangements in the mountain huts are cozy and booked solid. Be prepared to make some new friends!

Tips

Stash your extra clothes, shoes and gear at the 5th Station. There are coin lockers at the 5th Station. I wish I’d stashed a complete set of dry clothes, including shoes, in one of those lockers. While the onsen was great, it was awful having to put wet clothes on afterward. It’s also a cheap way to lighten your load up the mountain.

Take the tour. Definitely spring for the tour company (we used Willer Express and would recommend them again) and take them up on their entire rental package. Mountain hut reservations often fill up quickly, but the tour companies have standing reservations.

Prepare for the rain and cold. I had a base layer, cotton shirt, DriFit pullover, fleece jacket and rain jacket and my teeth were still chattering at the summit. My gloves were soaked and freezing. My two layers of socks were the only thing standing between my toes and frostbite. Choose layering clothes as the temperature difference between the 5th Station and the summit is pretty extreme.

Check the calendar. The climbing season is short. If you’re planning to climb Fuji, make sure to schedule your trip between early July and mid-September. While you can still climb in the off-season, shops and huts are closed and trails are not maintained and the ascent can be dangerous for inexperienced climbers.

Climbing Mount Fuji

Fuji Sunrise

“He who does not climb Mt.Fuji is a fool, but he who climbs Mt.Fuji twice is also a fool.” —Japanese proverb

One of the items on our Japan short-list was climbing Mt. Fuji. More than 200,000 people reach the summit of Fuji every year and numerous tour companies offer trips up the iconic mountain, which leads you to think “how hard could it be?”

The answer: One of the most physically demanding experiences of my life! And one of the most rewarding!

Starting the climb
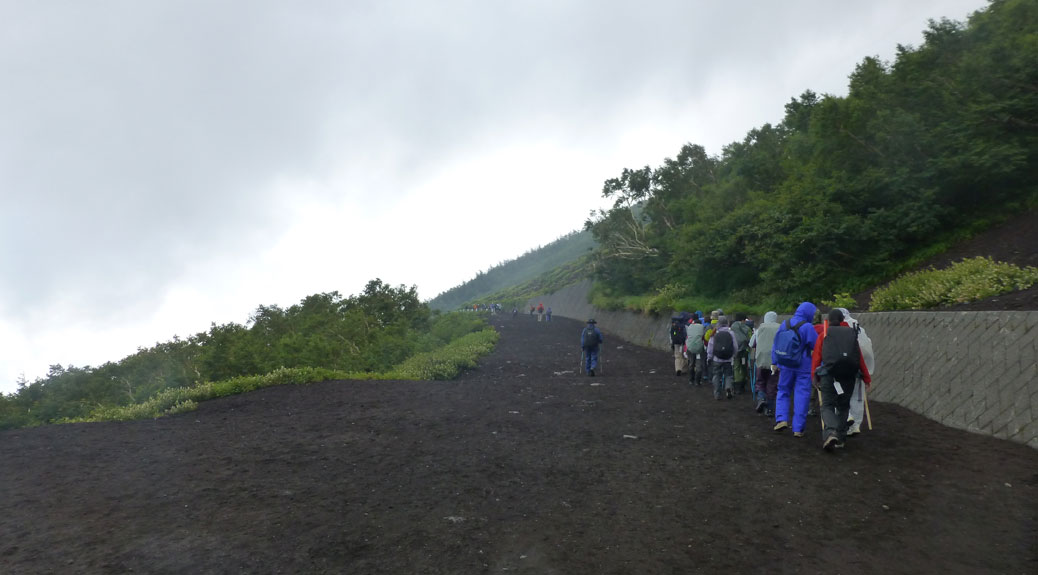
Early in the climb, full of energy despite the rain

We had a couple warm-up hikes during the summer, reaching the 1,200-foot peak of Hiwada, Takasasu and Monomi and Mitsumine’s 3,600-foot summit in July. But they certainly didn’t prepare us for the physical overnight grind of Fuji’s 12,388 foot (3,776 meter) ascent.

We started out from Fuji’s 5th Station, around 7,500 feet (2,305 meters) above sea level, at 11:30 a.m. The 5th Station is the most common starting point for the ascent with regular bus service, parking, restaurants, lodging and gift shops. Smartly, we took advantage of our tour company’s rain suit rental. The weather was temperamental at the beginning with strong winds and rain.

The Beauty of Fuji
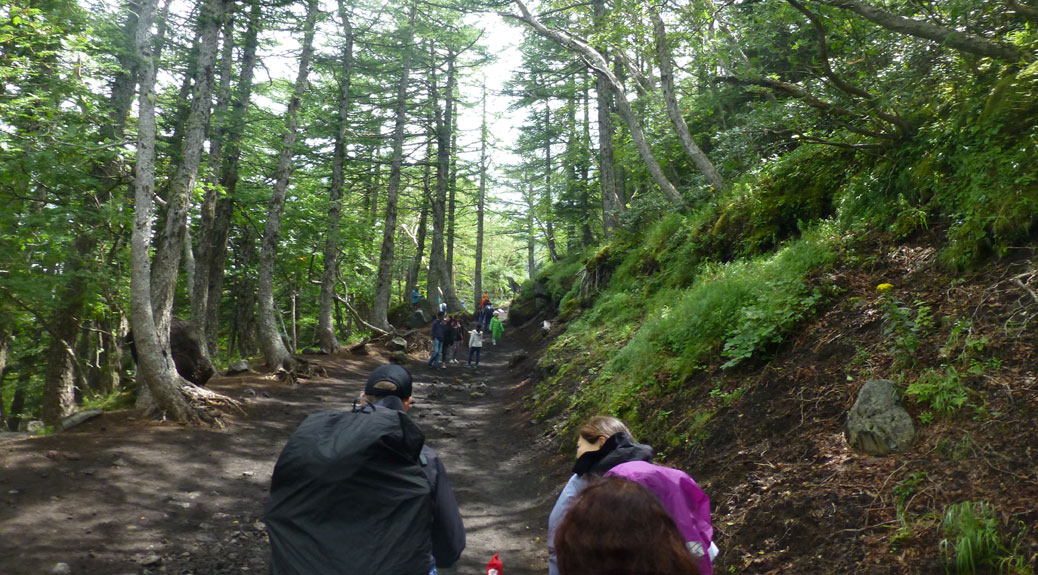
The rain gave way and the natural beauty of Fuji took over

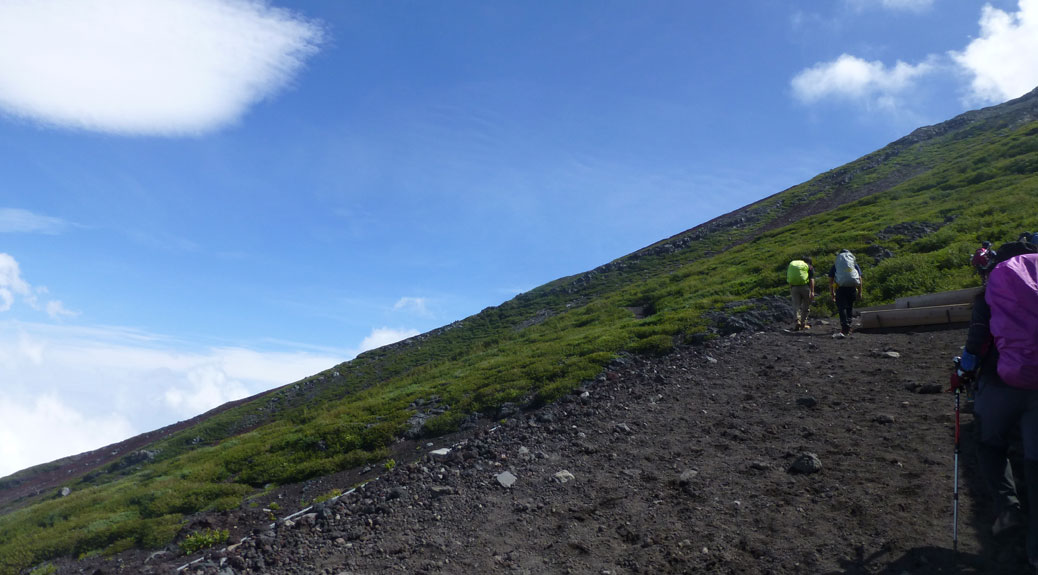
Fortunately, the weather broke quickly and we were able to shed some of our layers before too long. The lower part of the climb is mostly packed dirt and rock trails with a reasonable incline. We saw several families with kids early on, likely making a short day hike.

About an hour in, we reached the 6th Station and stopped for a short break to take in the view. Our trail guide, Midori, gave bits of information about the mountain along the way. Fuji is still an active volcano that last erupted in the 1700s. During the Edo Period (1603-1868), an entire religion (Fujiko) was built around worshipping the mountain. Due to it’s cultural importance, UNESCO named it a World Heritage Cultural Site in 2013 instead of adding it to the Natural Site list.

Mt. Fuji Switchbacks
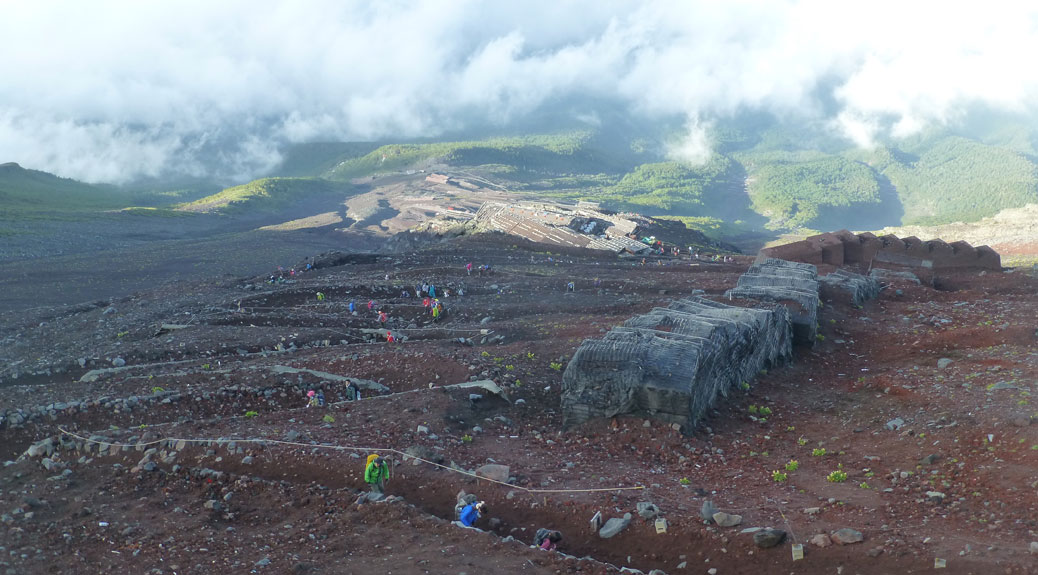
Looking down at the trail switchbacks as we approached the 8th Station

Beyond the 6th Station, the trail becomes a series of switchbacks with rest stations at regular intervals. The views of the cities below, as well as the view of the part of the mountain you’ve already conquered, give you the sense of being on top of the world. However, Fuji still has a lot of surprises in store.

Mt. Fuji Slope
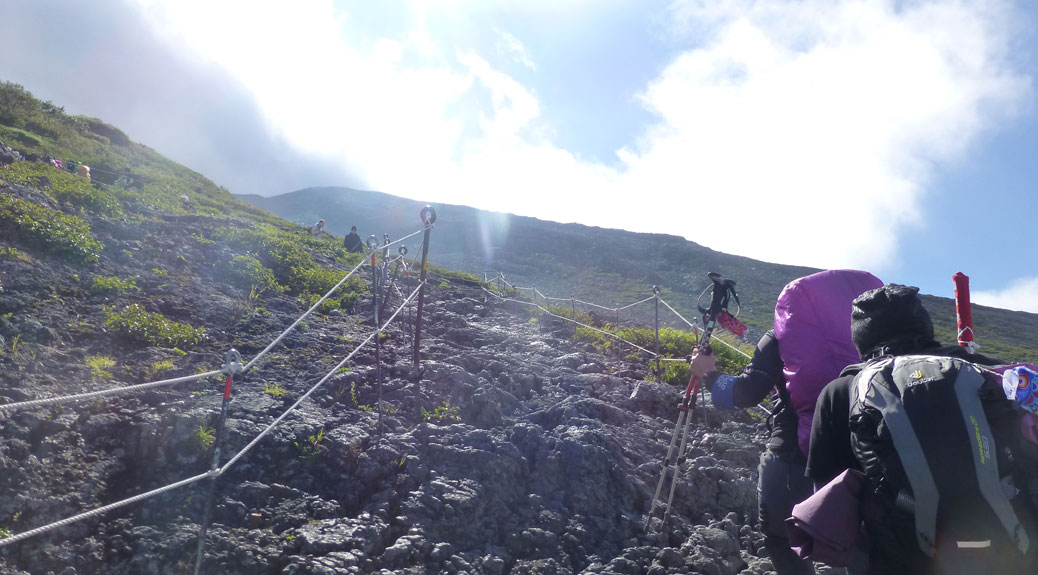
The drastic slope of Mt. Fuji. This is what you’re up against.

Beyond the 7th Station, the climb starts to get pretty technical in some places. Fortunately the rain had stopped, so the rocks were dry and traction was good. A side benefit of the rain was that the ash-covered paths had dried firm, making the non-rocky parts of the path fairly easy for walking.

Mt. Fuji Terrain
The terrain starts to get more technical as you move closer to the top

Our goal for the first day was the Tomoi Hut at the 8th Station (11,154 feet/3,400 meters). Our good fortune ran out about 20 minutes before we reached the hut as the skies opened up and rain poured down. By the time we reached the hut, we were soaked from head to toe. While the rain gear did its job, our backpacks were soaked through (including the plastic-wrapped change of clothes) and our shoes and socks collected the rain like a dish sponge.

Drenched to the bone, we reached the hut around 5 p.m. As we entered, a man blew the water off us with a leaf blower. Then, three or four people with hand towels wiped off the excess rainwater. We had to remove our wettest items on a tarp in the dining area and received a patdown to make sure we were dry before being allowed into the sleeping area.

Mt Fuji Bunk
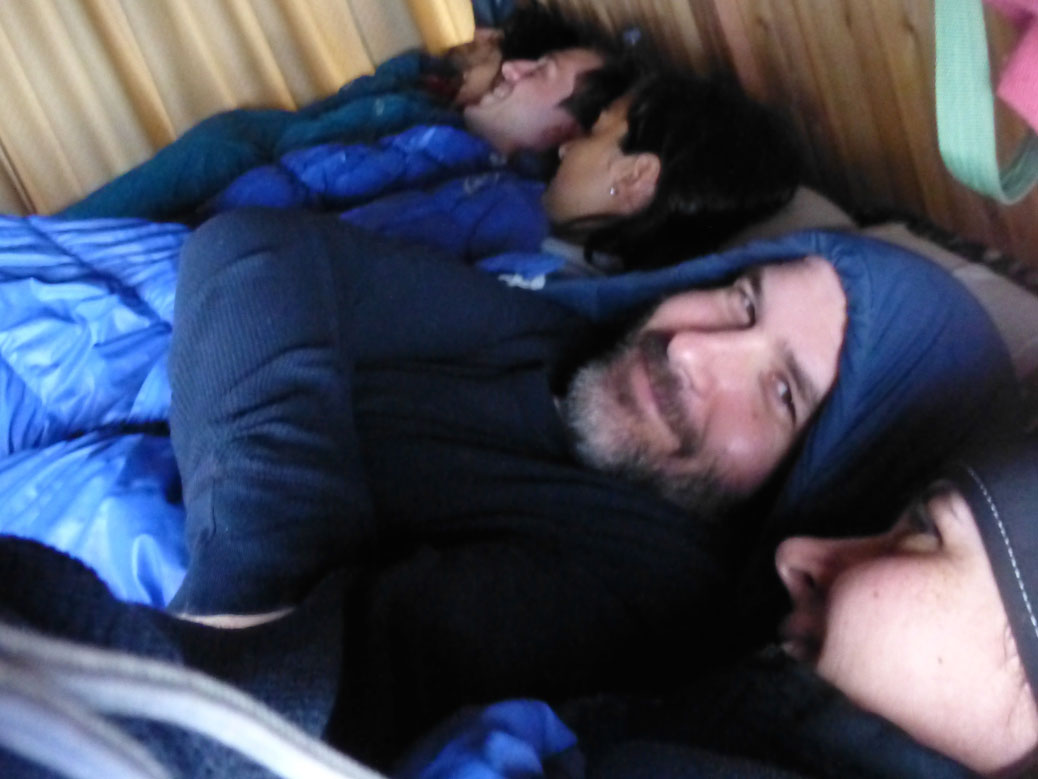
Sharing a bed with our new French friends, like Charlie’s family in Willy Wonka & the Chocolate Factory

So… the sleeping area. It’s basically a large wooden platform with six sleeping bags in a space made for about five people. They’re set up bunk-style, so there’s another platform below us with another six climbers. We were paired up with a group of tourists from France. Fortunately, they were pretty cool and didn’t snore.

Mt Fuji Dinner
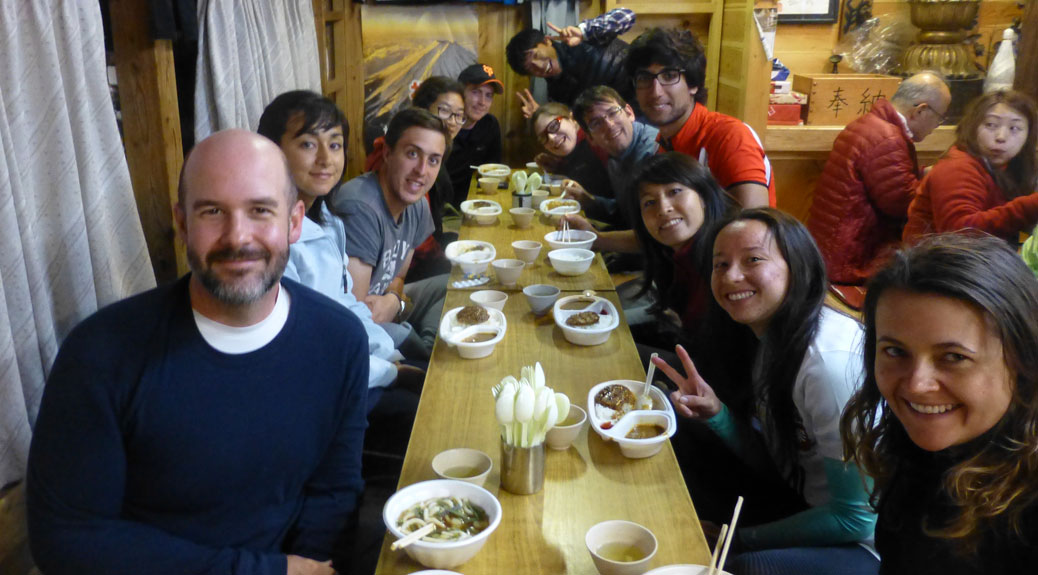
Dinner with our international assortment of friends

After a short rest, we were called for dinner. We sat at a long table and had udon noodles with rice, relish (tsukemono) and green tea. It was a perfect meal to warm up the insides. We ate with the rest of our hiking group: Our bunk mates from France, a woman from Brazil and a couple from Baltimore who were visiting her brother, a Navy man stationed in Yokosuka.

After dinner, we were encouraged to get as much sleep as we could. We’d have a 1 a.m. wake-up call to start our ascent to the summit. I’m not much for sleeping in strange places and, making the mistake of getting in the bunk first, I was between everyone and the window. I’d guess I got about an hour of sleep tops and had to do a bit of meditating to get past the claustrophobia that set in more than once.

Mt Fuji Headlamps
The view from our hut window around 1 a.m… a never-ending string of headlamps joining us for the climb to the summit

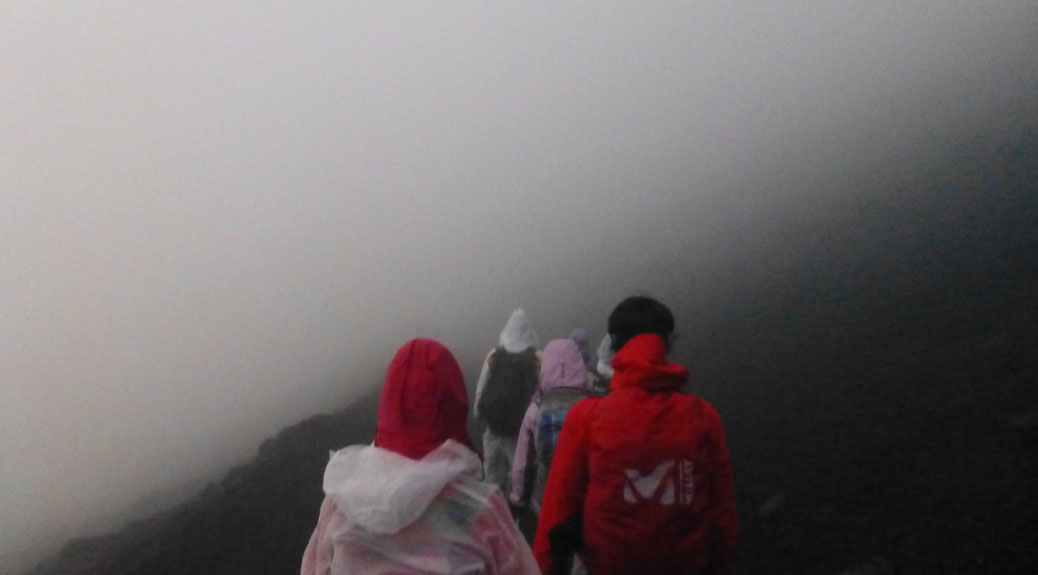
Our guides woke us up a little after 1 a.m. and I peeked out the hut window. Little white lights dotted the night sky for as far as I could see. We wouldn’t be alone in our trek to the top. While the last 1,000 feet from the 8th Station to the summit is only about 30 minutes worth of climbing, it actually takes about two hours because there are so many people. The rain never let up during the night, so there was a lot of stopping and waiting with nothing to do but get wet.

Mt Fuji Summit
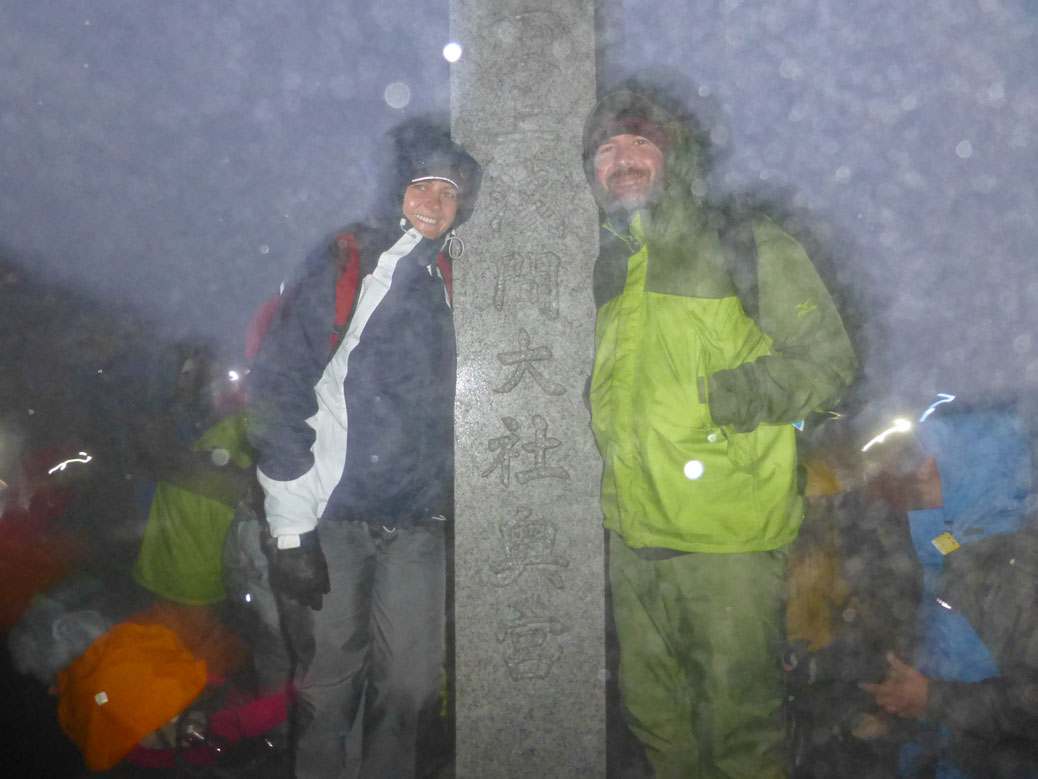
The summit of Mt. Fuji! We made it!

Around 4:15 a.m., we finally made it to the top. It was cold and rainy, but exciting to be at the summit. A large crowd waited for their turn to get into the snack shed where a small paper cup of 500 yen coffee waited for us. We tried our best to warm up for about 15 minutes. Our guide offered a tour around the crater, but there were no takers on this morning. The hut had packed up breakfast to go, which consisted of rice and a piece of fish. We gave the fish to our hiking buddies from Baltimore and carb-loaded on the rice.

Mt Fuji Descent
Beginning the descent down Mt. Fuji

So, here’s the thing you don’t really think about when you say “Let’s climb Mt. Fuji!” There’s only one way down and it involves another four hours of climbing. “It’s all downhill,” you tell yourself. But the ash on the descent path is thick and filled with round rocks that are perfect for tripping over. I only fell once on the way down and used my ninja-like agility to get back up quickly.

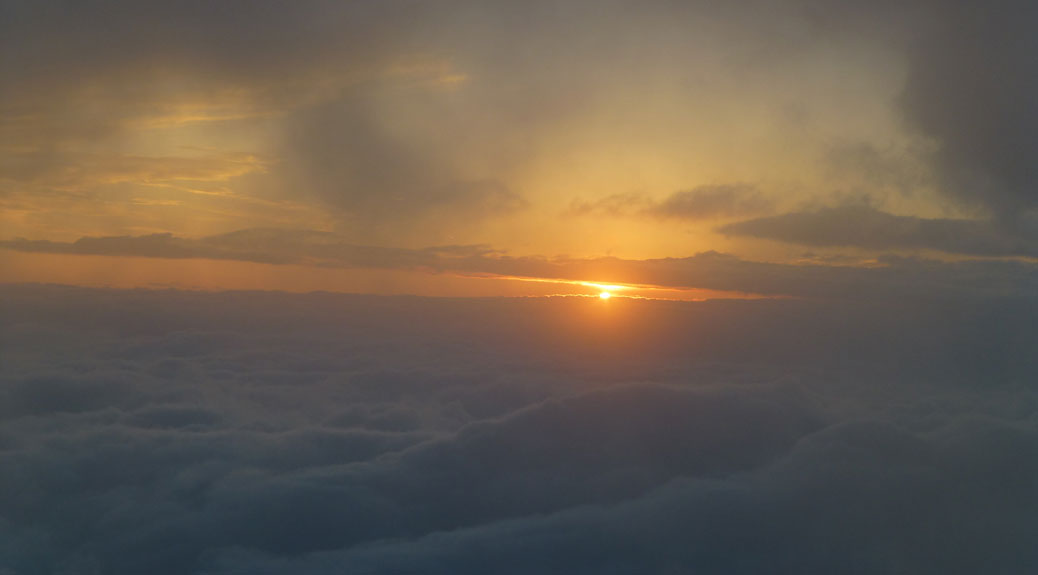
The reason you try to reach the summit around 5 a.m. is to view the sunrise. With the rain and fog set in so thick, we didn’t expect to see anything. But, a little after 5 a.m., something happened. The rain stopped. A hint of orange started to fight its way through the gray clouds. Finally, the clouds succumbed to the sun… magical!

Mt. Fuji Sunrise
Watching the sunrise from above the clouds

From this elevation, you’re actually above the clouds. The sun rises at eye-level and it is magnificent. With nothing between you and the sun but a horizon of clouds, it’s as close to Heaven-on-Earth as you may ever find.

Mt Fuji Rainbow
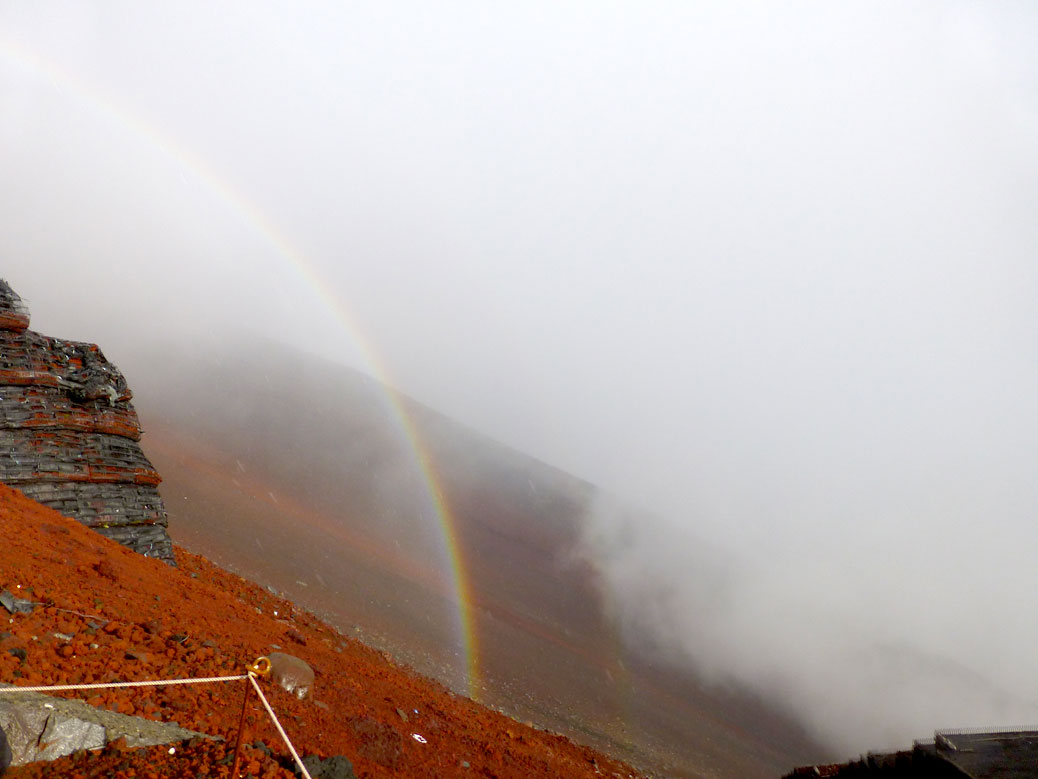
A full rainbow stretched out across the sky on our descent down Fuji

Not long after the sunrise, we came around a corner to find another side benefit of that horrible rain. A full rainbow curved across the sky, settling into the ground just feet from us. However, our pot of gold was still a few hours away.

Mt Fuji 5th Station
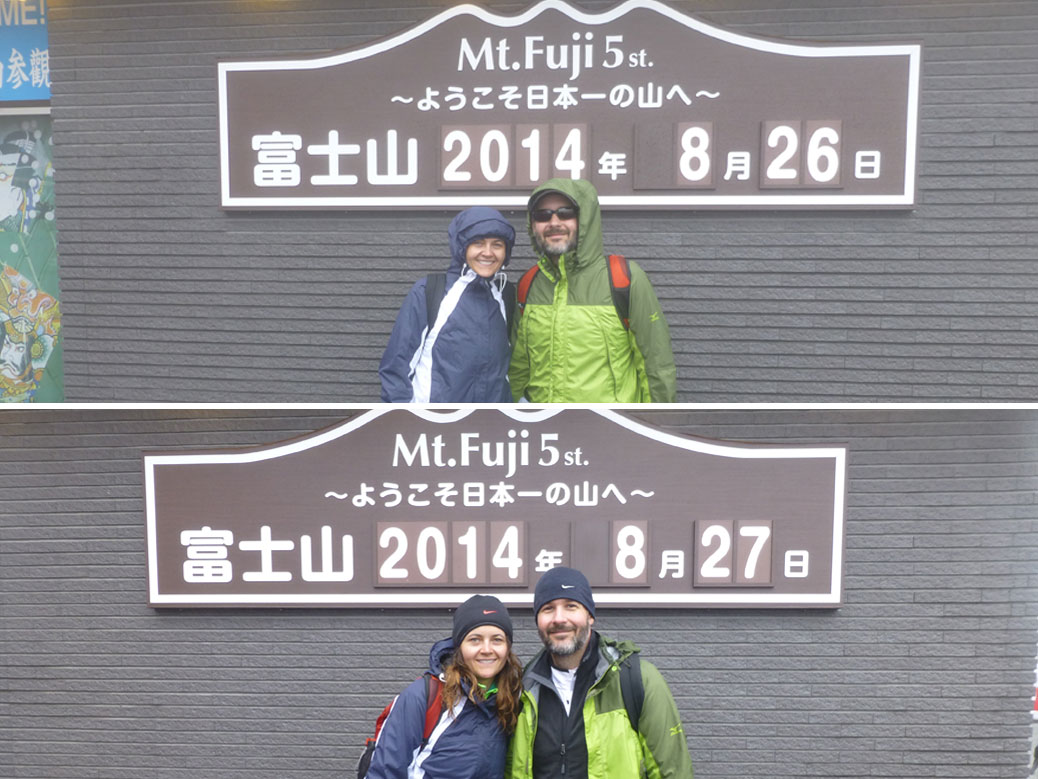
At the beginning and at the end… I think we look a lot better than we felt at the end of the climb!

A little after 9 a.m., we reached the 5th Station. The grueling terrain on the way back still aching in our legs, we were sure glad to be at the finish line. 22 hours, 9,600 feet of elevation traversed and one experience of a lifetime!

Tips for next time

I don’t know if we’ll be the fools who climb Fuji twice, but if anyone out there is thinking about it, here’s a couple lessons learned:

Take the tour. Definitely spring for the tour company (we used Willer Express and would recommend them again) and take them up on their entire rental package. The rain gear was money well spent, but a headlamp and waterproof backpack with cover would have been a great addition. They also handle the hut reservations and dinner/breakfast. Plus, most companies (ours included) take you to an onsen afterwards. There’s nothing better than a soak in the tub after that hike!

Prepare for the rain and cold. I had a base layer, cotton shirt, DriFit pullover, fleece jacket and rain jacket and my teeth were still chattering at the summit. Bring lots of layers as the temperature difference between the 5th Station and the summit is pretty extreme. Make sure to have waterproof boots and waterproof gloves as well. My gloves were soaked and freezing. My two layers of socks were the only thing that kept my toes from freezing off.

Stash a full set of dry clothes at the 5th Station. There are coin lockers at the 5th Station. I wish I’d stashed a complete set of dry clothes, including shoes, in one of those lockers. While the onsen was great, it was awful having to put wet clothes on afterward.

Check the calendar. The climbing season for Mt. Fuji is pretty short. If you’re planning to climb Fuji, make sure to schedule your trip between early July and mid-September. Trails and huts are closed the rest of the year.